WordPress with BlueHost: Just Let Go and Launch
If you are a recovering perfectionist like me, you may want to have everything picture-perfect and all laid out before launching your website. So many people (myself included) push back their website launch because it’s not “ready.” After months of analysis paralysis, I followed this exact process when starting my WordPress website with BlueHost in July 2019. And believe me, my website has evolved a lot since then! I know it can seem overwhelming, but trust me, it’s super easy! All you have to do is let go of your fears and get started.
I’m here to tell you that – your website will probably never be perfect, or “ready” in your eyes. You will constantly make updates, edits, and changes as you grow on your journey. But, what you can do is stop obsessing over the small things and just hit “publish.” Stop letting fear take over and take the first steps to launch your website!
If you follow the steps for BlueHost WordPress installation below, I promise you’ll have your website up & running well before you can procrastinate yourself out of the decision – possibly even today!
I tell you that with 100% certainty because I did so myself 😊
Websites Evolve Over Time!
Writing has always been a hobby of mine. In college, I started a blog to share things about my life, including natural hair, school, and other topics. College coursework picked up and my “blog” never made it to more than three posts.
Fast forward five years, and I found myself transitioning to a new lifestyle focused on mental health, holistic wellness, and self-care. Years of being sick and unhappy living with chronic gastrointestinal illnesses, I was ready for a change.
In graduate school, and even in my corporate jobs, people would ask about my career goals. I felt so weird and DUMB saying I wanted to build an online business through writing.
Maybe it wasn’t so dumb at all because now look at me! An online entrepreneur with a copywriting and web design business.
You Can Do It! Start Your Website on WordPress with BlueHost
Starting a website from scratch, on my own, is an accomplishment that I am so proud of!
If you have dreams of starting your website blog, or online brand, follow this step-by-step tutorial below.
Before we get into the technical details, I wanted to give you guys some background information. With so many different blogging tools out there, I wanted to share with you all why starting a WordPress website with BlueHost is the way to go in 2021.
What is WordPress with BlueHost?
WordPress is a content management system that powers over 30% of the Internet. WordPress is an excellent website platform for a variety of industries. With WordPress, your site is dynamic and optimized for growth over time. You can add a portfolio, start a business, or set up an e-commerce site, all using WordPress.
WordPress is open-source software that is 100% free to use. The software offers endless customization options with downloadable plug-ins and themes. Individuals can download WordPress for self-hosted installations from WordPress.org.
For the most customization for your blog, you want a self-hosted WordPress site. This post does a great job explaining the difference between WordPress.com and WordPress.org and why you want a self-hosted WordPress site for starting your new blog.
Web hosting providers store all of the files and information of your website on servers. These servers allow public users on the internet to access information through your domain name or the web address of your site.
I chose BlueHost to start my blog because it is an affordable hosting option that’s easy-to-use and includes awesome features like:
- FREE domain name for the first year
- FREE SSL certificate
- 1-Click WordPress install
- 24/7 support
They are currently running a special introductory offer and a 30-day money-back guarantee, all starting at only $3.95/month. I’m sure this won’t last long, so make sure to lock in your deal below. Let’s get your website launched!
Click here to start a blog on WordPress with BlueHost, then use the tutorial below for easy directions.
Disclosure: This post contains affiliate links. In the event of a sale, I will be awarded a small commission (at no extra cost for you).
STEP 1: Choose a Domain Name & Get Started on WordPress with BlueHost

One of the reasons I love WordPress with BlueHost is that you can purchase your domain name and hosting server from the same provider, all within a few minutes!
Click the green “Get Started” button on the Bluehost.com homepage to select your hosting package.

Choose a package option that best fits your budget and needs. BlueHost has four options: Basic, Plus, Choice Plus, or Pro. BlueHost recommends the Choice Plus Plan to receive domain privacy protection and site backup for your new blog. You do have the option of adding these features separately if you chose the Basic plan. There are also other plug-ins available for security and site backups – I use WordFence for security and UpDraft Plus for backups.
Next, choose your domain! Use the dropdown if you would like a different domain extension than .com (like .org, .biz, or even .blog).
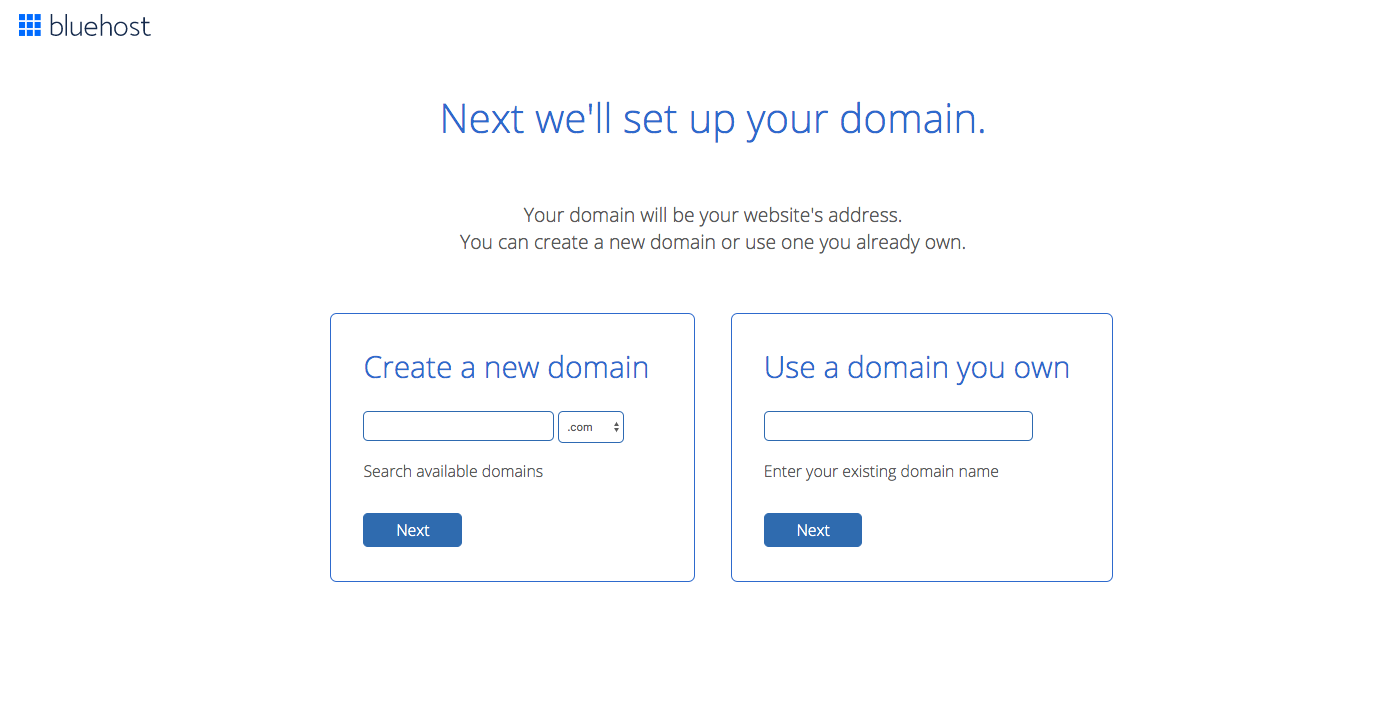
For your domain name, make sure you choose something that represents you and your brand. Pick a name that will grow with you and your business, and make you easily discoverable via search engines.
Once you pick your desired (free) domain name, fill out the necessary information to create your BlueHost account.

Then, select any additional extras for your package (optional) and proceed to input your payment information.


STEP 2: Log In to your Bluehost Website Hosting Account
This step is pretty simple! Create a password for your BlueHost website hosting account and proceed to log in.


STEP 3: Add Site Details and Install WordPress
After logging in to your BlueHost website hosting account, you’ll provide a few more details before getting started with your WordPress with BlueHost site. These details include your website name, site tagline, and the goals for creating your site (like blogging, e-commerce, or promoting a business).


Now, it’s time to get your blog going!
The first step to customizing your set is picking a theme. There are plenty of gorgeous free WordPress themes out there if you do a quick Google Search. If you aren’t sure about your website theme, that is not a problem! I’ve created a master list of amazing themes for bloggers, creative entrepreneurs, and service providers. I’ll update this post with the link!
You can go back and change your theme at any time. I played around with several different site themes before finally deciding on two – one for my business page and a different theme for my blog. Then, I ended up changing it a year later! You can also opt for paid premium themes if you want something more luxurious or unique. Just remember to get started, you aren’t locked into one theme forever.
After selecting your theme, BlueHost WordPress Installation is easy and pain-free! BlueHost will automatically install WordPress in one click, and you’ll be ready to start building your WordPress with BlueHost site.

Step 4: Start Building Your Site!

Woo-Hoo! You have a theme and are ready to build your site. First, let’s take a look at the dashboard or “backend” of your site.
Every time you log into BlueHost, you’ll see details of your site, domain, and files here. Simply press the blue “log in to WordPress” button.
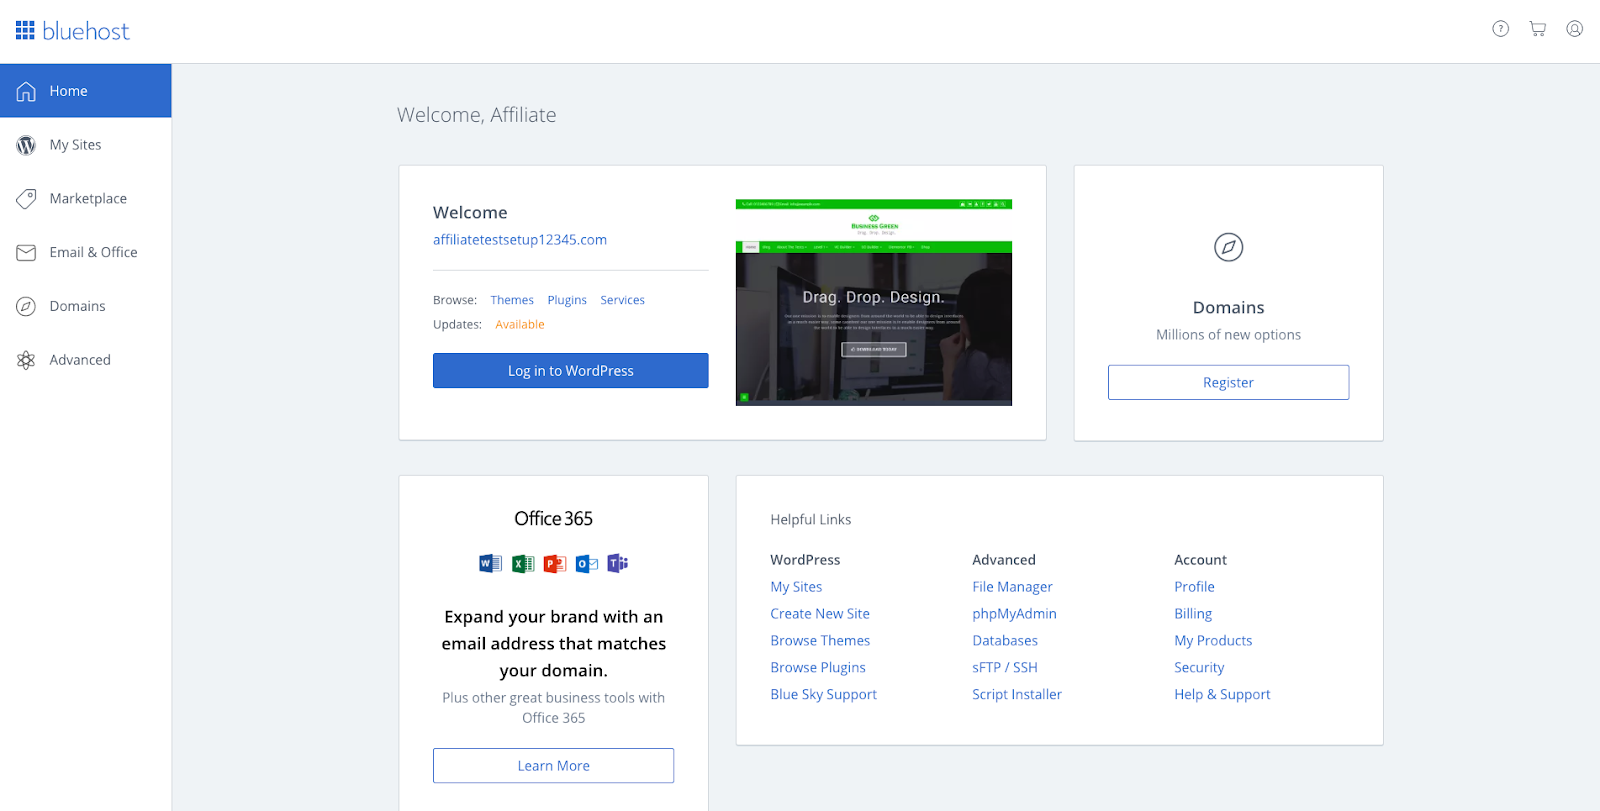
Now, you are into WordPress and can start adding all the bells and whistles to your site. I recommend adding a few plug-ins to your WordPress site to help optimize your website speed and performance – I’ll dedicate a future blog post just to that!
And once your website is up & running, check out some of my blog posts for content ideas and web copywriting tips.
- Are you Writing Web Copy? 10 Must-Dos and Tips to Avoid
- 101 Content Ideas for Your Wellness Business
- Boost Your Writing Skills with These 7 Awesome Free Tools
I hope this step-by-step guide to starting your WordPress with BlueHost website is helpful! I can’t wait to see what you accomplish.
If any of this seems overwhelming, book a free discovery call with me to learn more about my website design services.
I am rooting for you!
In wellness,
Mikayla
1 Comment on How To Launch Your Amazing WordPress with BlueHost Website in 4 Simple Steps
Comments are closed.